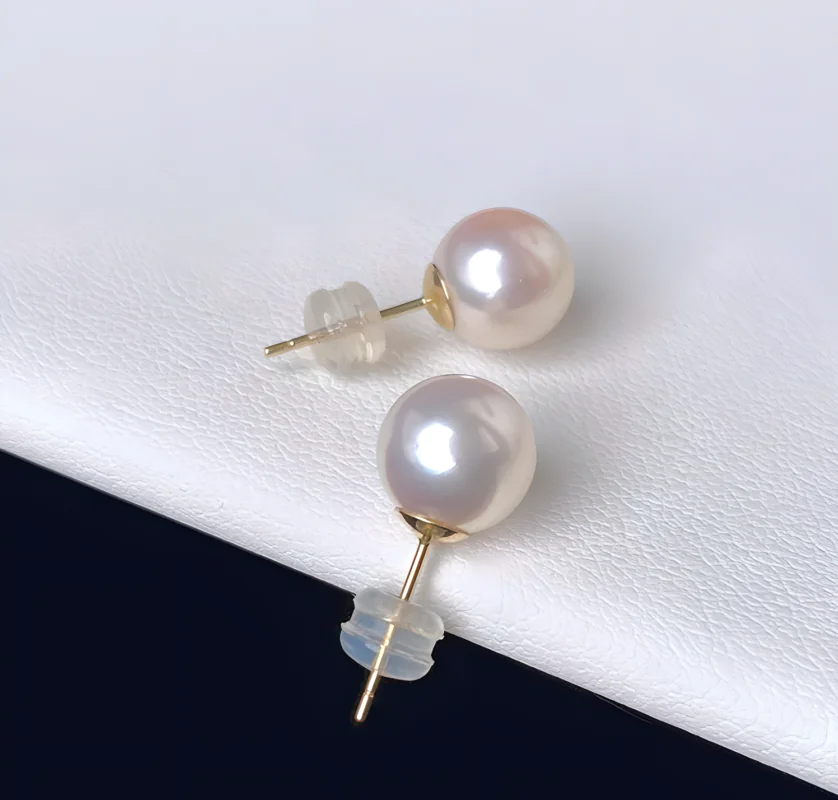
High-luster pearls do more than look bright. Their reflections appear strong, clear, and well defined, giving the surface a lively sense of depth. A low-luster pearl may still catch a bright highlight under a lamp, but the reflected shapes usually look softer, hazier, or more diffuse.
The most reliable way to evaluate pearl luster is therefore not to ask, “How shiny is this pearl?” Instead, ask: How bright are the reflections, how sharp are their edges, and does that quality remain visible as the pearl moves?
This distinction is important because photographs, point lights, polished surfaces, and camera exposure can all make a pearl look bright. True high luster is easier to recognize when you compare pearls under controlled conditions and pay attention to reflection quality rather than brightness alone.
What Does “High Luster” Mean in Pearls?
Luster is one of the major factors used to evaluate pearl quality. The Gemological Institute of America (GIA) describes high-luster pearls as having bright, sharp reflections, while lower-luster pearls show reflections that become progressively hazier, weaker, or more diffused. GIA also notes that luster is evaluated within the context of the pearl type rather than by assuming every pearl variety should look identical.
If you want a broader explanation of luster terminology, grading language, and how luster fits into overall pearl quality, see our Pearl Luster Guide. Here, the focus is narrower: how to test and compare luster in practice.
The Best Basic Method: Compare Pearls Under the Same Conditions
If you remember only one rule, use this one: luster is easiest to judge comparatively.
Place two or more pearls of a similar type under the same light, against the same background, at the same distance from your eyes. The stronger-luster pearl will usually separate itself quickly. Reflections look more distinct, light-and-dark areas show stronger contrast, and the pearl appears more visually “alive.”
This method is more dependable than trying to decide whether a single pearl is “high luster” in isolation. Your eyes become much better at judging quality when they have a reference.
Method 1: Use the Reflection-Edge Test
Look at the reflection of a recognizable object on the pearl. A window edge, dark clothing, a phone screen, a lamp shade, or another clearly defined shape can work well.
Do not focus only on whether you can see a white spot. Instead, inspect the edge of the reflected shape:
- High luster: reflected boundaries appear relatively crisp and distinct.
- Medium luster: reflections are still bright, but their edges soften.
- Low luster: reflections look weak, foggy, or broadly diffused.
A pearl is curved, so you should not expect a perfectly undistorted mirror image. The useful question is whether the reflected boundary stays well defined for a curved pearl surface.
Method 2: Use a Dark-and-Light Contrast Reference
High luster often becomes easier to see when the pearl reflects both a light area and a dark area at the same time. For example, hold the pearl where it can reflect a bright window next to a darker wall, curtain, piece of clothing, or card.
Then look at the boundary between those two reflected areas. A high-luster pearl generally shows a more decisive transition from light to dark. On a lower-luster pearl, that transition tends to blur together.
This is useful because a very bright lamp can create a strong highlight even on a pearl with only moderate luster. Contrast tells you more than the highlight alone.
Method 3: Rotate the Pearl Slowly
Do not judge luster from one stationary angle. Rotate the pearl slowly between your fingers, or move the strand slightly under stable lighting.
Watch how the reflected shapes travel across the surface. Strong luster should remain evident through movement rather than appearing convincing only from one exact viewing position. Rotation also helps reveal whether one side of the pearl looks noticeably duller than another.
This mirrors part of professional pearl evaluation practice. GIA describes examining pearls in a controlled environment, rotating them and comparing them with reference pearls to obtain an overall impression rather than relying on a single frozen view.
Method 4: Step Back and Judge the Whole Pearl
Macro photography and very close inspection are useful for checking surface details, but luster is also an overall visual impression. After looking closely, move the pearl back to a normal viewing distance.
Ask:
- Does the pearl still look bright and dimensional?
- Can you still see clear contrast across the surface?
- Does it look lively without needing a tiny, intense point light?
A pearl that looks dramatic only under extreme close-up lighting may not have the same visual impact when worn.
Method 5: Compare Like With Like
This is one of the most important ways to avoid a bad comparison.
Compare pearls that are reasonably similar in type, size, color, and viewing conditions. An Akoya pearl can naturally show a very crisp, mirror-like style of reflection, while South Sea pearls are often appreciated for a broader, satiny type of luster. Both can be high quality, but they do not necessarily present light in exactly the same way.
GIA specifically notes that different pearl varieties have different luster standards. So the most useful question is not, “Which of these two completely different pearl types is more mirror-like?” It is, “How strong is this pearl’s luster compared with good examples of the same type?”
If you are comparing multiple quality factors at once, our Pearl Grading Guide explains how luster, surface, shape, color, nacre, and matching work together.
Method 6: Check Luster Consistency Across a Strand or Pair
For earrings, necklaces, bracelets, and matched sets, evaluating one pearl is not enough. Look across the entire piece.
A strand can contain several individually bright pearls yet still look uneven if some pearls are visibly softer in luster than the rest. Move your eye from pearl to pearl and look for consistency in reflection strength and sharpness.
This is part of the broader idea of matching. For multi-pearl jewelry, GIA treats matching as a separate value factor that includes consistency in characteristics such as luster, color, shape, surface, and size.
When buying loose pearls or strands for jewelry making, this consistency can matter as much as the peak quality of the single best pearl in the lot.
How to Evaluate High-Luster Pearls Online
Online evaluation is harder because the seller controls the light, camera, exposure, contrast, and editing. A photograph can provide evidence of luster, but one flattering image should not be treated as proof.
Use several checks together:
- Look for more than one image. Different angles reduce the chance that one perfect reflection is doing all the work.
- Prefer photos that preserve reflection detail. If every highlight is pure white and blown out, it is difficult to judge edge sharpness.
- Look for reflected shapes, not only bright dots. Windows, dark cards, clothing, or room edges can reveal more about reflection quality.
- Check the whole strand. Luster should look reasonably consistent rather than concentrated in a few front-facing pearls.
- Use video when available. Movement can show whether reflections remain strong as the pearl rotates.
- Ask for comparison images. For higher-value purchases, a side-by-side photo of two grades under the same lighting can be much more informative than separate studio images.
For first-time buyers, our Pearl Buying Guide covers the broader decision process beyond luster alone.
What Professional Pearl Grading Adds
Professional evaluation is more controlled than a casual home inspection. According to GIA, its graders use a neutral gray background and a daylight-equivalent light source, examine pearls from a consistent viewing distance, rotate them, and compare them with carefully selected pearl masters. Repeatable conditions help reduce the effect of changing light and background on the judgment.
This suggests an important lesson for buyers: better evaluation comes from better-controlled comparison, not from a more complicated gadget.
For especially valuable pearls, laboratory classification can add independent documentation. But for ordinary buying decisions, you can improve your own visual judgment substantially by standardizing the light, background, distance, and comparison sample.
Methods That Are Easy to Misuse
Using only a phone flashlight
A small, intense light source can produce a bright hotspot on many smooth surfaces. It can help reveal reflection edges, but the size of the hotspot alone does not tell you whether the pearl has exceptional luster.
Judging brightness without sharpness
A pearl may look very white and bright because of exposure or lighting. High luster requires attention to the quality of the reflection, not just how much white light appears in the photograph.
Assuming a clean surface automatically means high luster
Surface quality and luster are separate quality factors. A pearl can have visible natural surface characteristics and still show strong luster. Conversely, a pearl with relatively few surface marks can still have soft or weak luster. Our Pearl Surface & Blemishes Guide explains this distinction in more detail.
Assuming thick nacre guarantees high luster
Nacre quality and luster are related, but they are not interchangeable measurements. GIA has noted that thick nacre does not by itself guarantee a lustrous appearance. Luster is the optical result you observe; nacre thickness and condition are related characteristics that may require separate evaluation.
Relying on seller grade labels alone
Terms such as “AAA,” “AAAA,” “top grade,” “strong luster,” and “mirror-like” are not automatically comparable across every seller. Use the label as a starting description, then verify what the pearl actually looks like under comparable conditions.
A Simple 60-Second High-Luster Pearl Test
If you have pearls in hand, this quick routine is usually more useful than trying to memorize grading vocabulary:
- Place the pearls under soft, stable daylight or daylight-equivalent light.
- Use a neutral or simple background.
- Compare at least two pearls side by side if possible.
- Find a reflected dark-and-light boundary.
- Judge both reflection brightness and edge sharpness.
- Rotate the pearls and see whether the reflection remains strong.
- Step back to normal viewing distance.
- For a strand or pair, check whether luster is consistent across all pearls.
If one pearl repeatedly shows sharper reflections, stronger contrast, and a more lively appearance under the same conditions, it is usually the stronger-luster pearl.
Does High Luster Automatically Mean a High-Quality Pearl?
No. Luster is extremely important, but it is still only one part of pearl quality.
A high-luster pearl may still have heavy surface blemishes, an undesirable shape for a particular use, poor matching in a strand, or other quality issues. Conversely, a very round, clean pearl may still look flat if its luster is weak.
For value decisions, it is better to treat luster as one of the first filters, then consider the other quality factors. Our guide to evaluating pearl value explains how these characteristics interact rather than treating any one feature as the entire answer.
Frequently Asked Questions
Can you evaluate pearl luster at home?
Yes. You can make a useful visual comparison at home by keeping the light, background, viewing distance, and pearl position consistent. Side-by-side comparison is especially helpful. A home test is not the same as a laboratory classification, but it can still reveal meaningful differences.
What is the easiest sign of high luster?
Look for bright reflections with relatively sharp, well-defined edges. Strong dark-and-light contrast is usually more informative than a single bright white highlight.
Are mirror-like pearls always the best?
Not necessarily. Different pearl types can have different characteristic luster appearances. Akoya pearls are often associated with crisp reflections, while fine South Sea pearls may show a softer, satiny character. Compare quality within the pearl type rather than expecting every type to look identical.
Can a pearl photo prove that the pearl has high luster?
A photo can provide evidence, but it cannot fully prove luster because lighting, exposure, contrast, and editing affect appearance. Multiple angles, video, and side-by-side comparison under the same conditions provide better evidence.
Does high luster prove that the nacre is thick?
No. Luster and nacre quality are related, but high luster is not a direct measurement of nacre thickness. Thick nacre also does not automatically guarantee excellent luster.
Final Takeaway
The best way to evaluate high-luster pearls is to make the comparison controlled and visual. Do not rely on a seller label, a bright hotspot, or a single edited photo. Look at reflection brightness, sharpness, contrast, movement, and consistency.
When possible, compare similar pearls side by side under the same light. That simple discipline removes much of the guesswork and makes true high luster far easier to recognize.